Wednesday, October 28, 2015

Weekend Treasure - Amy Howard One Step Paint

I bought this.


Why you ask.  Because I liked the ducky


hahahaha 

Okay I liked the bones and the glass knob.  So this happened.

1 - take hammer and destroy the duck
2 - apply stencil to the top of the box
3 - let it dry


4 - Can't get glass knob off so painters tape over it
5 - Apply Amy Howard One Step Paint - Selznick Grey


6 - Apply Amy Howard Vintage Affliction on the drawer and dry brush over the Grey
7 - Distress with sandpaper over areas that would get worn over time - bring back the yellow paint
8 - Apply clear and dark wax for a bit of aging 


Love the little treasure box with a pretty fun glass knob. 


I kinda miss the ducky........... later....

Wednesday, October 21, 2015

Beat up, Chunky, Dirty.....

It's been too long since my last update and I have lots of excuses....  Fall is to Photographers like April to Accountants..... need I say more?  yes...  I've been working on getting items ready to sell in a  downtown location...... more??  My full time job has been challenging lately with visits, audits, people, paperwork..... more??   Yep I got more.  I wasn't feeling well and since I'm pretty darn stubborn I chose to fight through it......... which around 1am knocked me out cold on the bathroom floor with my poor husband having to decide what to do with me.  I wan't out for too long, thank goodness but a trip to the ER was required and after a few tests, bags of fluid, rest, medicine and 4 days I might be getting back to normal.  John says I spread myself to thin...... heck I just like hearing I and thin in the same sentence.  Let's just say flu and scary low blood pressure was not a good combination.

So let's continue with the fun stuff.

I painted "Chunky" candle stick in a thin coat of white chalk paint.  Of course I forgot to take the before picture so imagine Chunky just wood when I bought him.


Added another thin coat of white to add a bit more coverage.


I then added aqua that was thick and chunky on the bottom of a paint can.  But I put it on with a paintbrush for the non-smooth areas and used a putty knife for the smooth area.  Paint so thick you can apply with a putty knife will need to be left overnight to dry.

Next step was to distress.  You can see the paint applied with a putty knife didn't give complete coverage and left raised areas giving Chunky a beat up, rough look.


Yep I paint my fingers too.


A coat of clear and dark wax and Chunky makes my heart swoon.  A plain ole wood candle holder is now a Chunky Dream.


Add candle with a little burlap and he's ready for the store.  


Are you a fan of Chunky?  It's not easy painting with a putty knife and actually it's messy and a real pain in the...... but of course I had to try it.   What about you?     

Later....

Tuesday, October 13, 2015

Chalkboard Craze

 Chalkboards are a big craze right now and I'm right in that craze.  I have 4 in my house and 2 at the cottage.  I love to update them with the season, search on Pinterest for ideas of what to write or draw on them, enjoy them for a short while and start all over again.  It's like having new art in your house whenever you want.  And the frame is super cute in fun colors.

I'll be teaching a Amy Howard at Home One Step Painting Class on Thursday October 29th at ACE Hardware located within County Market.  The class will be from 6:00pm-8:00pm and will teach you how to paint a chalkboard with fun painting and waxing techniques.  If you'd like to sign up contact ACE Hardware for more information.    Class is free but a donation of 3 canned good is required for a local pantry.  Call them now at  (715) 748-4066, class size is limited to 15 people.

You will make this......


change to this.


You will learn to distress and wax and give your frame dimension.


And then you can hang them all over your house.....


Up North I just painted them right on the pantry door....


and closet door.


They can add information to your home or just a little bit of sweetness.  


Who doesn't need a chalkboard?         Later.......

Tuesday, October 6, 2015

Trash to Treasure Tuesday

The second hand store is starting to put out their Christmas decorations and there are a TON of them.  I'm not normally a seasonal decorator but a few things catch my eye.  These stoneware plates did.  The snowflakes are so big and they are puffy giving them a 3 dimensional look.  
Each one under 50 cents I decided they were worth a shot at making pretty.


If you liked them before you might want to stop reading.  I didn't like the brown color.  
I painted them all white.


Then I painted one a soft blue,one a soft pink and kept one white.


Gave them a bit of distressing bring out the dimensional look and help the white and brown peek out from under the color.


Now here's a helpful tip.  Using E6000 glue, attach a soda can tab to the back of the plate.  Let them dry overnight.


 So having to take a photo of them was the most difficult part.  I found a wide worn out board in the garage that was perfect for the display.  Gave it a quick sanding to smooth our the rough spots and a oil rub to bring out the color and then I attached three nails and hung the plates on it from their soda can tabs.  

The Christmas holiday is a ways away yet, heck I just got my fall decor up so this little location was easy to swap out for a bit of a wintery look and then swap back to fall.  


Yep I have a dresser in my house that is not painted.....and missing a knob.... why you ask?  Because I'm always too busy painting for everyone else that I never get my own done.  Kinda like a mechanic who's car is past due for an oil change or a carpenter who's house has no trim..... same thing.


I gave each of the plates some dark wax for a dirty vintage look, here you can see the details.


That red wall has got to go..... maybe this weekend I'll get time to paint it.


What treasure can you find in the trash...... later


Monday, October 5, 2015

Amy Howard Cracked Patina

Amy Howard has a super fun product called Cracked Patina.  It will give you the look of something that's been painted with a couple coats of paint and it started to crack and chip away.  I haven't ever been a fan of the crackle finish that was popular a few year ago but with a little research and Amy Howard's product I'm sold. 

The first thing you do is paint a first coat of Amy Howard, I chose Charm School on this medallion.  It's best to chose the darker color to go on the bottom.  


After the 1st coat of paint is dried you apply a coat of Cracked Patina.  It goes on like a sticky clear layer of paint.


You wait for the cracked patina to dry and then paint the lighter color and it will start to crack.  You'll want to not paint over areas so try to paint in sections being careful to only get the paint in the section you are painting.  I would have tried to get a photo of it before it cracked but it's a fast process and there was no time for photos.  


When you would see items from old houses with chippy paint there were areas that were missing the paint totally and some that were just cracked apart.  To get the missing paint you'll want to wait for the paint to dry a bit and then take your hand and press it on top of the paint and pull it away, some of the paint will stick to your hand and create the missing paint areas.  This is really messy but totally worth it and it washes off with water so that's even better.  

I did a clear Amy Howard clear wax (right side) and Amy Howard antique wax (left side)


This piece I put Amy Howard wax on like I do with all my other waxes and it was totally wrong.  I got it to turn out good in the end but it was pretty iffy there for awhile.  


Here I am working really hard to save this piece. 


Note to self (and you) - Read the directions and follow them.  

I am the type of person that does not read direction first, I jump right in and then when it goes wrong I'll resort to reading the directions.  John is the total opposite he'll read directions before doing anything and then he follows them step by step..... me I skip around and make up some of my own steps.  

Here is the finished medallion.


I'll talk about the correct way to wax with Amy Howard waxes in another post.  After I read the direction and did it her way I LOVE this wax.  It would be my first choice in wax.

Another cracked patina project.  I won't walk you through all the steps since they are all the same as above.  

I bought a crate from a second hand store for part of the Amy Howard display.  It's the perfect size for holding paint cans but it's a bit dated.


Spa White with Tick Tock over the top.  

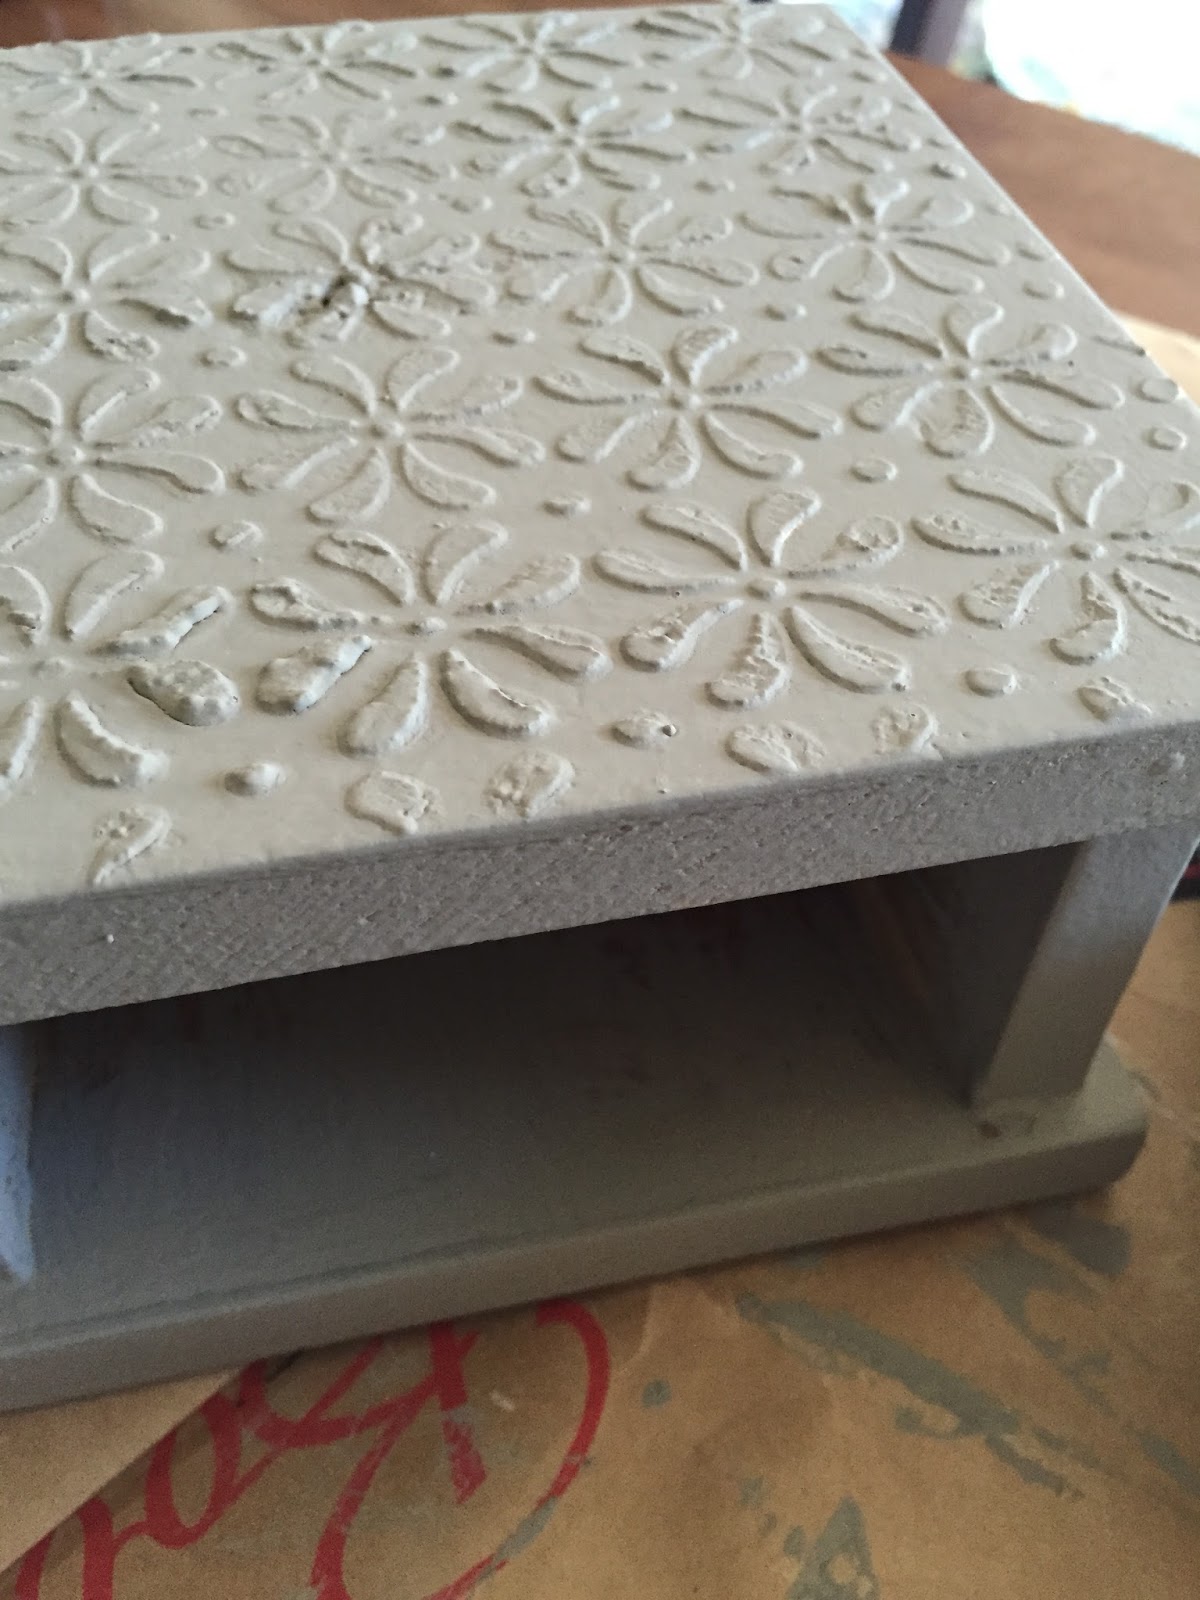
Raised stencil is another fun project I do to give flat surfaces a fun twist.  I'm sure I'll post that process someday if you beg me to.  


I liked the look but didn't love it.


Now with another layer of cracked patina and Charm School I love it.


I have another example of cracked patina but I'll share that with you in a few days.  

Tomorrow is Trash to Treasure Tuesday so be sure to come back and check out what project I have going on for that.  

You'll love the cracked patina so head on up to ACE Hardware located within County Market and pick up a couple cans of paint and patina.     Later......